
This post explains the step-by-step process to run a VirtualBox OVA built for x86_64 architecture on a modern Mac that uses ARM64 (Apple Silicon) processors. Because of the architectural differences, the virtual machine cannot be executed directly and must be converted and launched through emulation. The procedure uses QEMU to convert the virtual disk format and UTM to create and run the virtual machine on macOS. Note that since this setup relies on emulation rather than native virtualization, performance will be noticeably slower than running the same machine on an x86_64 host.
Format Conversion
If you only have the *.ova file, you will need to extract the hard disk and convert it to *.qcow2 format. If you already have the *.qcow2 file, you can skip this section and go directly to the UTM section.
Extract the OVA File
-
Copy the
.ovafile to a folder, for example the Desktop. -
Open Terminal and go to that folder:
1
cd ~/Desktop -
Extract the contents of the
.ovafile:1
tar -xvf machine_name.ova
Where
machine_name.ovais the name of the downloaded file (e.g.,Kubuntu-Intranet_2025-2026.ova). -
After extraction, several files will appear. The most important one is the virtual disk file with the
.vmdkextension (e.g.,Kubuntu-Intranet_2025-2026-disk001.vmdk).
Install QEMU
QEMU is an open-source machine emulator and disk conversion tool that allows you to work with virtual machine images from different platforms and formats. In this guide, it will be used to convert the VirtualBox disk image into a format compatible with UTM.
Homebrew is a popular package manager for macOS that makes it easy to install command-line tools and utilities from the Terminal. We will use it to install QEMU.
Open the Terminal application and install QEMU using brew:
1
brew install qemu
If the previous command fails due to write permissions, you should change the ownership of some directories as suggested by the output of the command itself:
1
2
# Replace the next command with the one shown by brew
sudo chown -R ...
Convert the VMDK Disk to a UTM-Compatible Format
In the same folder you extracted the *.ova file, run the following command:
1
qemu-img convert -f vmdk disk.vmdk -O qcow2 disk.qcow2
Where disk.vmdk is the name of the extracted file (e.g., Kubuntu-Intranet_2025-2026-disk001.vmdk) and disk.qcow2 the name desired for the generated disk.
This process may take several minutes depending on the disk size.
UTM
UTM is a virtualization and emulation application for macOS that makes it easy to run virtual machines on both Apple Silicon (ARM64) and Intel-based Macs. It is built on top of QEMU and provides a graphical interface to configure and launch virtual machines without needing complex command-line options. In this guide, it will be used to run the converted x86_64 virtual machine through emulation.
Install UTM
- Download UTM from the official website: https://mac.getutm.app
- Drag the UTM application into the Applications folder.
- Open UTM and accept any permissions requested by macOS.
Create the Virtual Machine in UTM
- Open UTM.
- Click the Create button.
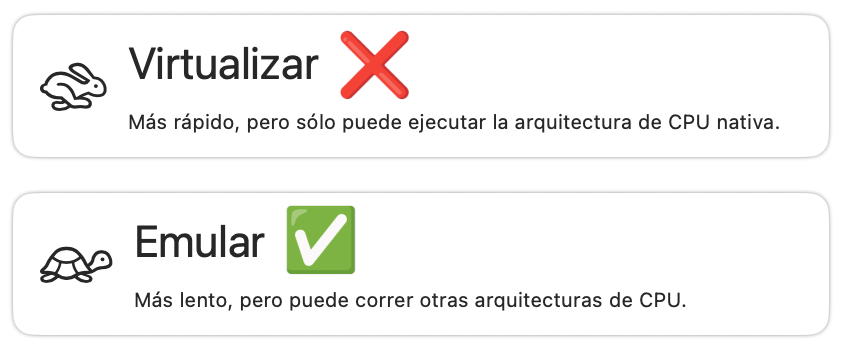
-
Select the Emulate option:
![]()
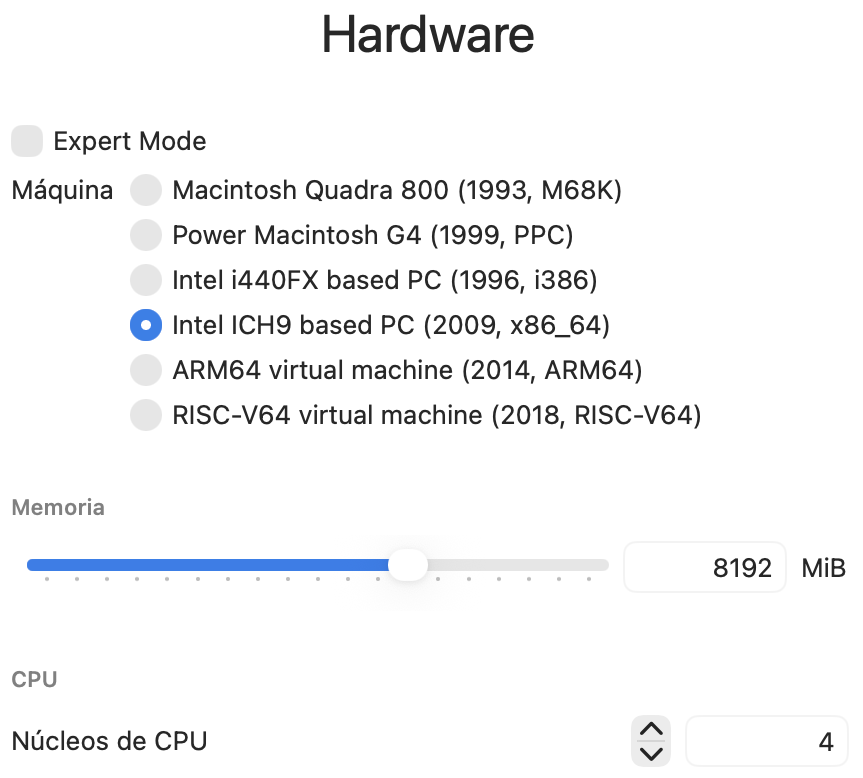
-
Select a x86_64 hardware architecture, and tune the RAM memory and CPUs according to your computer availability:
![]()
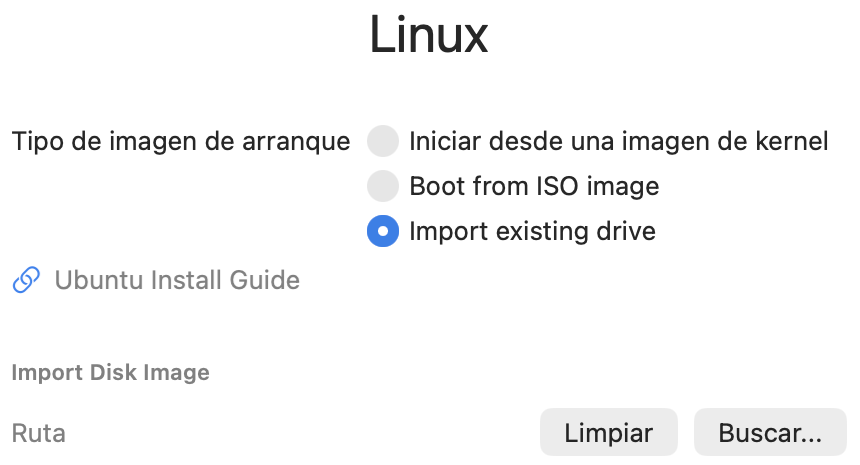
-
Import existing drive to select your
*.qcow2file:![]()
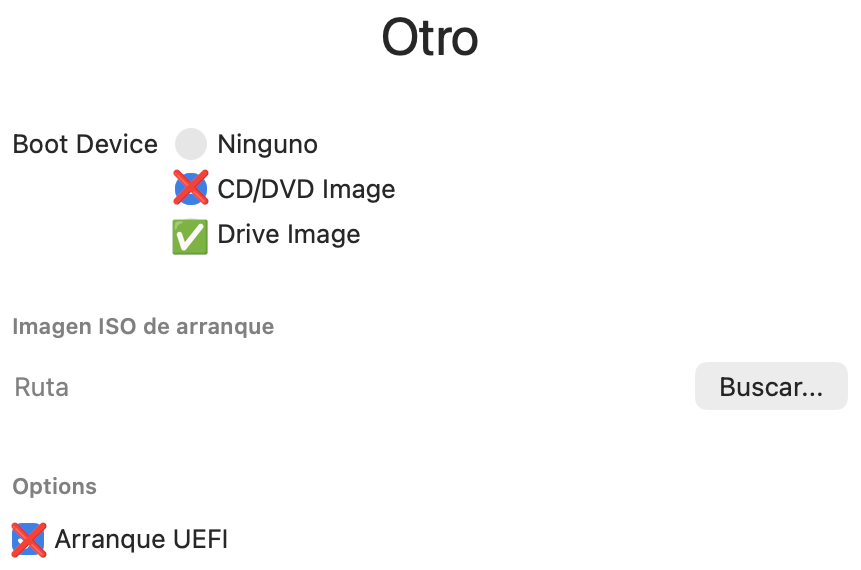
-
Configure to boot from the hard drive and disable UEFI:
![]()
Start the Virtual Machine
- Select the created virtual machine in UTM.
- Click Start.
- Wait for the system to boot. The first boot may take longer than usual.
Comments powered by Disqus.